How to use a piezoelectric buzzer
Introduction****
A piezoelectric buzzer is an audio signaling device or loudspeaker that makes use of the piezoelectric effect to produce sound. It has its application in many things, from alarm devices to the confirmation of user input by beeping or buzzing to alert the user.
This element is usually powered by an alternating electronic circuit that creates a mechanical motion when a voltage is applied to a piezoelectric material, and then the sound is converted into audible sound using a piezoelectric audio amplifier.
As it is powered by an alternating current, changing the frequency of the current will result in a proportionate change in the frequency of the sound produced. When compared to other speaker types, this component is much easier to drive.
Modern Applications****
Some of the modern applications of this device are found in;
- Electronic metronomes- Annunciator panels- Sporting events(buzzers)- Electrical alarms.
The list goes on. This component has a wide range of operating voltages thus making it versatile.
So assuming you are designing different products that will be used directly by people, you would need a way for the users to interact and receive information from this device. Maybe you want a user to know when a device is done with a particular task, and when they can switch to another.
A piezoelectric buzzer is a great way to go, as you have a wide range of operating voltages which it works with. How do you then pick the buzzer to use? Here’s some good advice for when you’re picking out a mini SMD piezo buzzer. Basically, cost, application, and size all come into play when picking a buzzer to fit your project.
How to use a Piezo Buzzer****
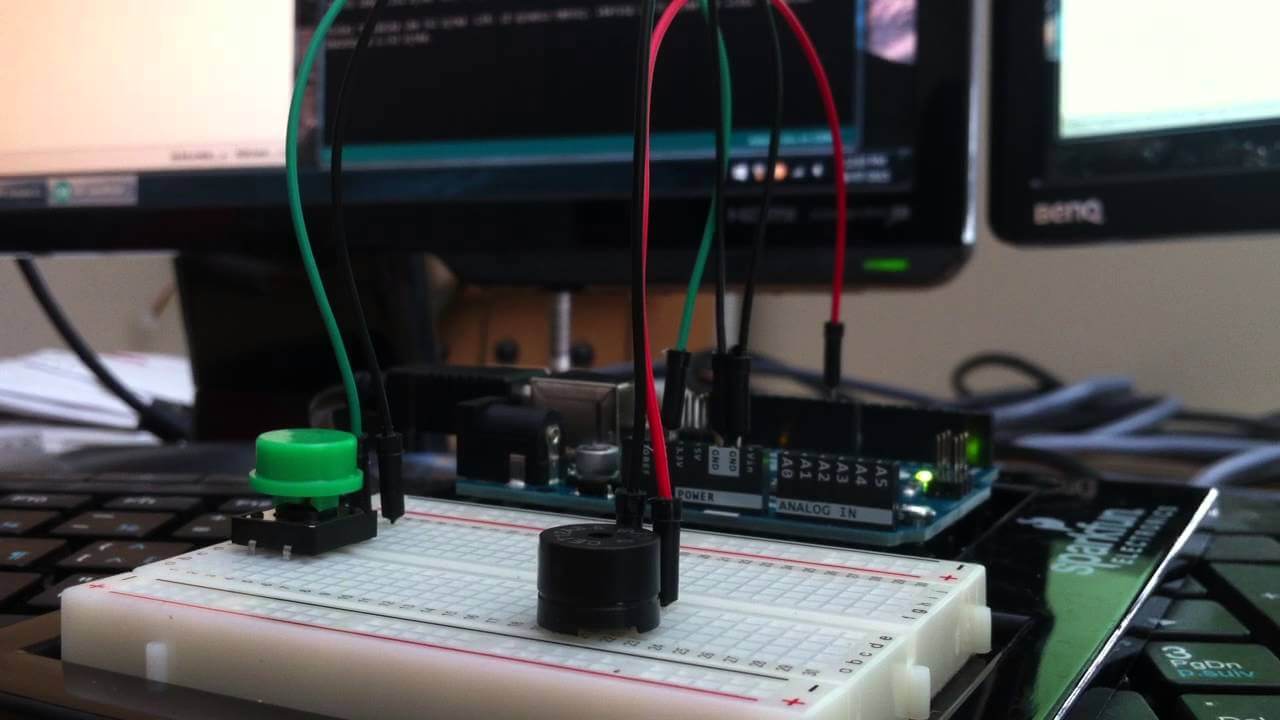
How do you use a piezo buzzer? Well, wiring the component is fairly easy. First, you connect the positive leg of the buzzer to the digital pin on your Arduino. The negative leg of the buzzer connects to the ground on the Arduino. The positive and negative legs are differentiated by a small plus sign above the positive leg of the buzzer.
The negative leg has no sign above it. Next, you will need to apply a code to your Arduino that tells the buzzer when to come on and when to go off and at what frequency. Easy to use templates of this code are available on the internet and you can make alterations to the frequency to fit your needs.
Electromechanical buzzers and Mechanical buzzers are other examples of buzzers. Electromechanical buzzers are based on the design of the electric bell, and as such will consist of two contacting surfaces that strike each other multiple times when an alternating current is applied. Mechanical buzzers require only moving parts to produce a vibration that is usually accompanied by a buzzing sound. A popular example of this is the joy buzzer usually worn on the hand as a practical joke to give a vibration to the hands of the other party during a handshake that could feel like an electric shock. Contrary to popular notion, joy buzzers use no electricity at all.